Home/Store/Coffee Enema Kits & Enema Supplies
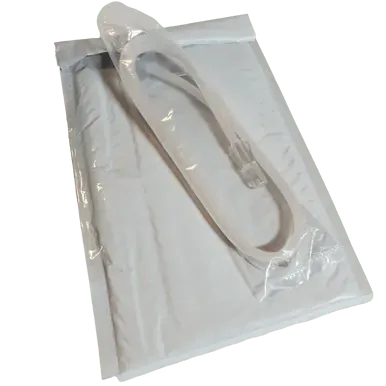
Tubing with Fittings for Enema Fix (Replacement Hose)
+4
+3
+2

Tubing with Fittings for Enema Fix (Replacement Hose)

SKU 2084
$16.00
In stock
1
Share this product with your friends
ShareSharePin it
Customer reviews
Reviews only from verified customers
No reviews yet. You can buy this product and be the first to leave a review.
Tubing with Fittings for Enema Fix (Replacement Hose)
Product Details
Brand: Creatrix Solutions
Availability: Ships M-F, same day if ordered by 1 PM PST
Shipping: Calculated at Checkout
MPN: RH-EnemaFix
Enema Fix® Replacement Part

Tubing with Fittings for Enema Fix® – Replacement Hose

Refresh your Enema Fix® Complete Enema Kit with replacement tubing designed with integrated fittings for the pump and compatible rectal or vaginal tips.

Coffee, minerals, oils, and repeated use can stain tubing over time. Replacing an older hose helps keep your system cleaner, easier to inspect, and more reliable during priming and use.

Replacement Hose Integrated Fittings Pump Compatible Tip Compatible Airtight Connection Easy System Refresh

Replace the hose when

  • Coffee staining becomes difficult to clean
  • The tubing becomes cloudy or discolored
  • The hose feels stiff, brittle, sticky, or cracked
  • A fitting no longer seals tightly
  • The tubing develops odor or residue
  • Priming becomes difficult because air enters the connection
Why Replace the Tubing?

Keep the Enema Fix® system clean, flexible, and easy to prime

Coffee naturally contains pigments and oils that may darken flexible tubing. Staining alone does not always mean the hose has failed, but it can make it harder to inspect the inside of the tubing and confirm that it is fully clean.

Over time, repeated bending, washing, drying, and exposure to solutions may also affect the flexibility and fit of the hose. A fresh replacement hose helps restore a clean appearance and secure pump-to-tip connection.

Cleaner Appearance

Replace tubing that has become deeply stained, cloudy, or difficult to inspect.

Flexible Handling

Fresh tubing is easier to position without kinking, cracking, or resisting movement.

Reliable Priming

Secure fittings help prevent air from entering the line while the pump draws solution.

Integrated Fittings

Designed to connect the pump to compatible rectal or vaginal tips

The replacement hose includes integrated adapters at both ends. One end connects to the Enema Fix® pump spigot, and the opposite end accepts a compatible rectal or vaginal tip.

Both connections must fit fully and tightly. A partial connection can leak, separate during pumping, or allow air to enter the line.

Airtight matters because the pump must create suction

When the pump plunger rises, it creates negative pressure that draws solution through the straw and into the hose. A loose fitting allows room air to enter instead, which can interrupt suction, make the pump difficult to prime, and reduce fluid flow.

Pump-Side Connection

How to attach the hose for a secure, airtight fit

1

Disconnect All Components

Make sure the jar is empty and the pump is not under pressure. Separate the old tubing from the pump and remove any tip from the opposite end.

2

Inspect the Pump Spigot

Check that the spigot is clean, dry, smooth, and free of residue. Coffee oils or moisture can make the fitting slip or prevent a complete seal.

3

Align the Pump Fitting

Hold the hose fitting straight in line with the pump spigot. Avoid attaching it at an angle, which can stretch one side and leave a gap.

4

Push the Fitting Fully On

Push firmly until the adapter is seated as far onto the pump spigot as designed. A connection that rests only on the tip of the spigot may leak or pull off.

Do not use oils or lubricant on the pump connection

Lubricant may prevent the tubing from gripping the spigot and can cause the hose to slide off under pressure.

When the Fitting Is Very Tight

Use brief, gentle warmth to soften the tubing end

A tight new fitting is often desirable because it contracts around the pump spigot and creates a secure seal. When the adapter is too firm to push completely into place, use brief, gentle warmth.

  1. Hold only the pump-side tubing adapter.
  2. Use a hair dryer on low heat for a few seconds.
  3. Keep the dryer moving and avoid overheating one spot.
  4. Stop as soon as the fitting becomes slightly more flexible.
  5. Immediately push the adapter fully onto the clean, dry pump spigot.
  6. Hold it in place while it cools.
  7. Allow the material to contract around the spigot before leak testing.

Do not melt or deform the fitting

Excessive heat may weaken the tubing, distort the adapter, or create a poor seal. The fitting should become only slightly flexible—not hot, sticky, stretched, or misshapen.

Tip-Side Connection

Attach the compatible tip securely

  1. Inspect the tip and hose fitting for cracks, residue, or damage.
  2. Align the tip connector straight with the tubing adapter.
  3. Push the tip fully onto or into the fitting, depending on the compatible design.
  4. Gently tug the connection to confirm it does not separate easily.
  5. Do not force together parts that do not match.

Use only compatible tips

A tip that is too small may leak or detach. A tip that is too large may split or permanently stretch the fitting.

Leak Test and Priming

Test the new hose before use

  1. Assemble the pump, draw straw, gasket, jar adapter, and jar correctly.
  2. Fill the jar with plain room-temperature water for the initial test.
  3. Attach the replacement hose and compatible tip.
  4. Hold the tip over a sink or shower.
  5. Pump until water travels through the hose and displaces the air.
  6. Inspect the pump-side and tip-side fittings for dripping, bubbles, slipping, or separation.
  7. If air repeatedly appears in the tubing, stop and reseat the pump-side fitting.

A properly sealed hose should prime into a continuous stream

A few initial air bubbles are normal. Continued air entry, weak suction, or fluid leaking around the adapter usually indicates a loose connection, incomplete seating, or damaged fitting.

Cleaning and Drying

Care for the replacement hose after every use

  1. Disconnect the hose from the pump and tip.
  2. Flush the tubing with warm—not hot—water.
  3. Use a mild compatible soap when needed.
  4. Rinse thoroughly until no coffee, soap, or residue remains.
  5. Drain all retained water from the hose.
  6. Hang or position the tubing so both ends remain open to airflow.
  7. Allow the hose to dry completely before storage.

Do not seal damp tubing inside a closed container. Trapped moisture can encourage odor and microbial growth.

When to Replace Again

Inspect tubing regularly rather than waiting for failure

  • Replace the hose when it becomes cracked, split, brittle, or sticky.
  • Replace it if the integrated fitting no longer grips securely.
  • Replace it when internal residue cannot be removed.
  • Replace it when persistent odor remains after cleaning and drying.
  • Replace it when the tubing repeatedly draws air despite correct assembly.
  • Replace it if the hose has been shared or contaminated.
Product Specifications

Enema Fix® Replacement Hose details

Product Tubing with Fittings for Enema Fix®
Part type Replacement hose with integrated fittings
Pump connection Designed to attach to the Enema Fix® pump spigot
Tip connection Designed for compatible rectal or vaginal tips
Primary purpose Replace stained, worn, damaged, or poorly sealing tubing
Complete Enema Fix® kit included No
Rectal or vaginal tip included Not specified
Frequently Asked Questions

Enema Fix® Replacement Hose FAQ

Why does coffee stain the tubing?
Coffee contains dark pigments and oils that can gradually discolor flexible tubing. Deep staining can make the hose harder to inspect and may remain even after thorough cleaning.
Does staining always mean the hose is unsafe?
Not necessarily, but replace the hose when staining is accompanied by odor, residue, stiffness, cracking, stickiness, poor sealing, or difficulty cleaning.
How do I make the pump connection airtight?
Clean and dry the pump spigot, align the fitting straight, and push it fully onto the spigot. If the new fitting is very tight, warm it briefly with a hair dryer on low heat, push it fully into place, and allow it to cool and contract.
Why does the pump draw air instead of liquid?
The pump-side fitting may not be fully seated, the tubing may be damaged, the gasket may be out of position, or another connection may be allowing air into the system.
Can I lubricate the pump spigot?
No. Oil or lubricant may cause the tubing to slip off and interfere with the airtight seal.
Can I heat the tubing to make it fit?
Use only brief, gentle warmth from a hair dryer on low heat. The fitting should become slightly flexible, not hot, melted, stretched, or deformed.
How do I test the hose before use?
Assemble the system with room-temperature water, prime the hose over a sink or shower, and inspect both fittings for leaks, slipping, and continued air entry.
Can the hose connect to rectal and vaginal tips?
The integrated fitting is designed for compatible rectal or vaginal tips. Confirm the specific tip fits securely before use.
How should I dry the hose?
Drain it completely and leave both ends open to airflow until the interior is fully dry.
Does this product include the complete Enema Fix® kit?
No. This listing is for the replacement tubing with integrated fittings only.

Product manual: Enema Fix Manual — setup, operation, and care instructions.

What Customers Say

“The product was received in a timely manner. Love this product. It's has help me greatly.”

— Ray M., 2025 · verified buyer

Read more customer reviews →

Reviews collected from verified customers via our previous review platform. Individual experiences vary.

Show More
  • Search Products
  • My Account
  • Track Orders
  • Shopping Bag
Powered by Lightspeed
Display prices in:USD
Skip to main content
Creatrix Solutions
Saunas
Exercise
Air Purifiers
Skin Care
Salt
Ozone
Enema Kits
Contact
About
Other
Location
Menu

creatrixsolutions

Terms of UsePrivacy PolicyShipping & Payment InfoReturn PolicyReport Abuse
Powered by Lightspeed