Equipment Instructions
This manual focuses on identifying, assembling, priming, operating, cleaning, and maintaining the equipment.
Use this complete Enema Fix® manual to identify each component, assemble the pump and tubing, prime the system, clean reusable parts, store the kit, and troubleshoot common flow or connection problems.
The instructions on this page apply to the reusable Enema Fix® Mason jar pump system and its compatible hose, lid, pump stem, and soft silicone rectal tip.
Check the glass, tubing, lid, pump, stem, and silicone tip before every use.
Connect the draw tube, pump, hose, and soft tip without forcing any fitting.
Pump slowly until solution fills the hose and large air pockets are removed.
Rinse reusable components promptly and allow them to dry fully before storage.
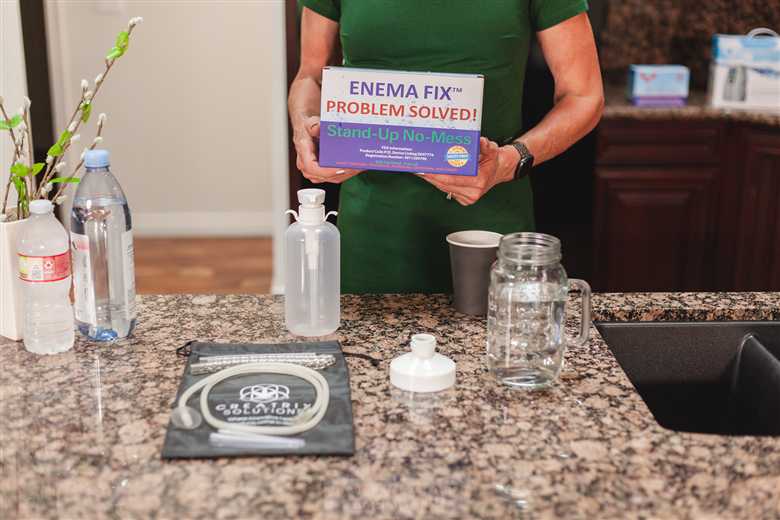
The Enema Fix® Complete Enema Kit combines a glass Mason jar reservoir with a reusable pump, lid, tubing, and soft silicone components. Correct assembly helps the system draw liquid efficiently, while routine inspection and cleaning help preserve the condition of the reusable equipment.
This manual focuses on identifying, assembling, priming, operating, cleaning, and maintaining the equipment.
Individual components are available separately so worn tubing, tips, stems, lids, jars, and pumps can be replaced without purchasing another complete kit.
Use the Creatrix Solutions video and transcript library for demonstrations and supporting educational resources.
Visit the Enema Kits and Accessories category or continue to the replacement-parts section of this manual.
Inspect the Mason jar carefully before every use. Never use a chipped or cracked jar. Avoid sudden transitions between very hot and cold temperatures, do not overtighten the lid, and place the jar on a stable surface where it cannot be knocked over.
The instructions explain how to operate and care for the equipment. They do not prescribe ingredients, diagnose a condition, replace medical care, or establish whether a particular wellness practice is appropriate for you.
The Enema Fix® works with either the glass Mason jar or the plastic bottle. Lay out every part on a clean surface and inspect it before you begin.
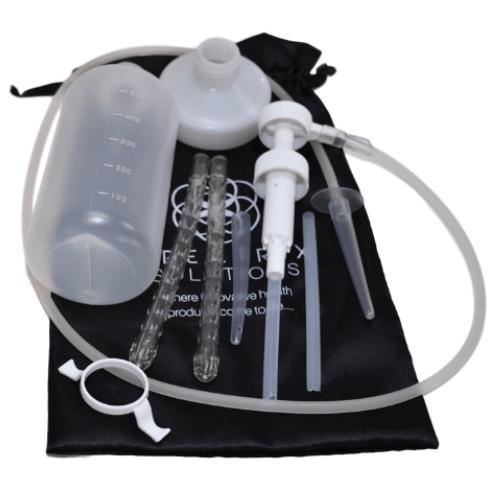
Two reservoir options hold your prepared liquid. Inspect the glass jar for chips or cracks before every use.
View Replacement Glass JarThe hand pump draws liquid up and pushes it through the tubing without hanging a bag overhead. Opens like a shampoo-bottle dispenser.
View Mason Jar Pump KitA short straw for the plastic bottle and a long straw for the glass jar. The diagonally-cut end points toward the bottom to siphon liquid.
Threads onto the draw straw so you can comfortably hold the whole Enema Fix while pumping. The contoured underside cradles your fingers.
The trapezoid-shaped adapter connects the pump spigot to the delivery hose. It is heat-shrunk for a leak-tight, air-tight seal.
View Replacement HoseChoose your preferred tip for the end of the tubing adapter. Inspect for tears or a loose fit before use.
View Soft Rectal TipWork slowly and keep the parts aligned. Fittings should connect firmly without excessive force. If a piece will not seat, remove it, inspect it, and try again rather than forcing it.

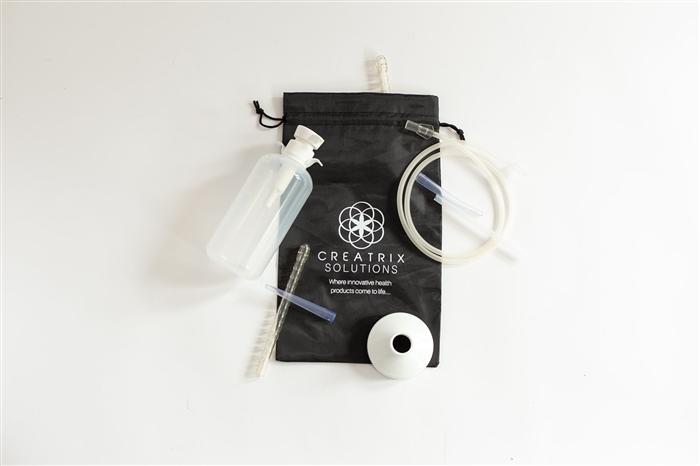
Hold the screw cap in one hand and turn the pump plunger/spout counterclockwise with the other. It pops up like a shampoo-bottle dispenser — about nine counterclockwise rotations to open.
Push the correct draw straw onto the fitting inside the bottom of the pump — the long straw for the glass jar or the short straw for the plastic bottle — with the diagonally-cut end pointing toward the bottom.
Insert the draw straw through the center ring of the finger grip. Position it so the contoured underside lets your fingers hold the whole Enema Fix comfortably while pumping.
Securely screw the pump assembly onto the jar adapter, making sure the gasket sits between the jar and the adapter.
Attach the trapezoid-shaped tubing adapter to the pump spigot — orient it correctly for a complete seal that keeps out air. Push it on tightly, then warm it with a hair dryer so it shrinks tight onto the spigot. Let it cool for a leak-tight seal.
Add your preferred tip to the end of the tubing adapter. Fill the jar with your prepared solution and screw the pump assembly back on with the gasket in place.
The jar can break if the pump is not completely screwed onto the adapter and the jar separates while you hold it. Double-check that connection so you can safely hold the pump and jar by the finger grip. Once half the liquid is dispensed, keep the jar on the shower floor — the hose is extra-long, so you can keep pumping with the jar down. Keeping the jar on the floor or a wide bench minimizes accidental breakage.
Priming pushes the air out of the pump and hose so liquid flows smoothly. You will waste a small amount of fluid while priming — that is normal.
Hold the jar handle with one hand. Keep two fingers on the finger grip and your thumb on the pump plunger, and vigorously pump up and down while pointing the tip into the sink. Continue until the air is pushed out and liquid flows steadily from the tip.
Confirm every connection is oriented correctly and securely tightened — the pump on the jar adapter, the tubing adapter on the spigot, and the tip on the hose — before moving on.
Once the tubing is primed, slowly insert the tip — with optional lubrication — and gently pump the liquid into the rectum. Pump at a comfortable pace and pause whenever you need to.
Intermittently massage up your left side, horizontally across your abdomen, and down your right side to move the fluid through the bowel. Pick the method that works best for you.
Take a 7–10 minute shower; when you feel a strong urge to eliminate, step out to the toilet. A squatty-potty stool helps — massage your abdomen in the reverse direction. Then rinse off and repeat if desired.
Do not continue if something feels unsafe or significantly uncomfortable. Seek guidance from a qualified healthcare professional when appropriate.
Whether you use the stand-up, no-mess Enema Fix®, a stainless-steel bucket, or a bag, these steps walk you through preparing the coffee and taking the enema.
Use organically grown medium-to-dark roast coffee where possible; any regular coffee will work. Never use decaffeinated or low-acid coffee, and avoid light or green roast for daily use.
Brew with about 2 cups of purified water and 2–3 tablespoons of grounds. You can use less if the amount is hard to retain, or up to a quart (4 cups) for more thorough cleansing.
Fill mostly with purified or spring water, then add brewed coffee — about 1 tablespoon of brewed coffee per 32 oz of water (1 teaspoon if you are caffeine-sensitive). Lubricate the tip with a little soap or oil.
Measure 2–3 cups of purified water and 2–3 tablespoons of coffee into a stainless-steel percolator. Brew on high for 7–10 minutes, let it settle, then strain out any grounds.
Bring the water and coffee to a boil in a saucepan and boil 5 minutes. Turn off the heat and cool (ice cubes speed this up). When cool to the touch, strain into your enema device.
Stir 1 cup ground coffee into 2 cups water and soak overnight. In the morning, strain into a storage jar and refrigerate.
A common routine is at least one enema per day to support liver activity and the body’s natural detoxification.
It is easiest to retain the enema after a bowel movement. If needed, a plain-water enema first can help clear the colon.
Lie on your back on a towel in the tub or on the floor. A small pillow or rolled towel under the buttocks helps the flow. The stand-up, no-mess Enema Fix® also lets you do this in the shower.
Slowly insert the tip until it is all the way in, then let the liquid flow (open the clamp on a bag or bucket, or pump gently with the Enema Fix). Stop the flow once all the liquid is inside.
Retain for about 15 minutes, then empty into the toilet (longer is fine if comfortable). Afterward, thoroughly wash the equipment and tube with soap and water.
Avoid coffee enemas in the evening, as they can interfere with sleep. Light exercise beforehand can help release intestinal gas. If you feel cramping, close the clamp (or stop pumping), rotate from side to side, and take a few deep breaths — cramps usually pass quickly.
Prompt cleaning helps prevent residue from drying inside the hose, pump fittings, lid openings, and soft tip. Separate the washable parts carefully and clean them before storage.
Dispose of unused liquid appropriately. Do not leave liquid standing in the jar, tubing, or pump assembly after use.
Unscrew the lid without forcing the threads. Lift the pump and internal draw tube out of the jar carefully.
Hold each fitting near the connection point and pull gently. Avoid stretching the hose or twisting the soft tip excessively.
Use warm water and mild dish soap. Clean around fittings, openings, threads, and surfaces where residue may collect.
Run clean warm water through the full length of the silicone hose until it appears clear and free of residue.
Remove all soap residue, shake out excess water, and place the components where air can circulate around them.
| Component | Routine Care | Replace When |
|---|---|---|
| Glass Mason Jar | Wash with warm water and mild dish soap. Rinse thoroughly and dry before storage. | Immediately if chipped, cracked, deeply scratched, or otherwise damaged. |
| Pump Lid Assembly | Clean around the threads, openings, fittings, and sealing surfaces. | If cracked, distorted, leaking, or unable to tighten securely. |
| Hand Pump | Keep exterior surfaces clean and prevent residue from drying around the stem and fittings. | If it sticks, leaks, cracks, or no longer moves liquid reliably. |
| Pump Stem | Rinse and inspect the connection points for buildup, wear, or distortion. | If loose, cracked, bent, or unable to maintain a secure connection. |
| Silicone Hose | Flush the full length with clean warm water and hang or position it to drain. | If split, stiff, cloudy, discolored, stretched, or loose on the fittings. |
| Soft Silicone Tip | Wash carefully with warm water and mild soap, then rinse thoroughly. | If torn, rough, permanently deformed, discolored, or unable to attach securely. |
Tubing and small fittings may look dry on the outside while still holding water internally. Position the hose and components so trapped moisture can escape before storage.
Do not seal damp components inside a closed container. Allow full air circulation until all visible moisture is gone.
Store the glass where it cannot roll, fall, or be struck by other objects. Avoid stacking heavy items on or around it.
Store the silicone hose in a loose coil. Avoid sharp folds that may create permanent kinks or weakened areas.
For storage, keep the lid loose or store it separately so the gasket and threads are not held under constant pressure.
Look for residue, moisture, cracks, loose fittings, stiff tubing, and changes in the soft tip before the next use.
Individual parts can be replaced without discarding the complete system.
Before each assembly, check the jar, lid, pump stem, pump action, draw tube, delivery hose, and soft tip. Early replacement of a worn component can help prevent leaks and flow problems.
Most problems come down to a kink, a loose fitting, or a worn part. Work through the flow path from the jar to the tip, and never force a pump that feels blocked.
| What you notice | Likely cause | What to do |
|---|---|---|
| The pump feels blocked or very hard to press | Kinked hose, blocked fitting, mis-positioned draw tube, or an incorrectly seated connection. | Stop pumping and inspect the entire flow path. Straighten the hose, reseat each fitting, and confirm the draw tube reaches the liquid. |
| Liquid will not reach the tip while priming | The draw tube is not reaching the liquid, or air is leaking in at a loose fitting. | Check that the draw tube extends toward the bottom of the jar and that every connection is fully seated, then prime again with slow, complete strokes. |
| A fitting is leaking | A connection is not fully seated, or a part is worn. | Reseat the connection. If the tubing, tip, or lid is split, stiff, or distorted, replace that component before continuing. |
| The hose separates from a connector | The hose end is stretched or the fitting is worn. | Push the hose fully onto the fitting. If it no longer holds with a light pull, replace the hose. |
| Flow slows or stops mid-use | A kinked hose or a low liquid level. | Straighten the hose and check the liquid level in the jar. |
| The lid will not tighten or leaks at the jar | The lid is cross-threaded, or the lid or gasket is worn. | Remove the lid and reseat it evenly without forcing the threads. Replace the lid if it is cracked, distorted, or will not seal. |
Unexpected resistance usually means the flow path is obstructed. Stop, inspect the complete path from jar to tip, and correct the problem before pumping again.
Every reusable component is available separately, so a worn part never means replacing the whole kit. Replace any component that is cracked, split, distorted, excessively worn, or unable to hold a secure connection.
The reusable reservoir. Replace immediately if chipped, cracked, or deeply scratched.
View Replacement Glass JarSupports the pump and seals the jar. Replace if cracked, distorted, or unable to tighten.
View Replacement LidMoves liquid through the hose. Replace if it sticks, leaks, or no longer pumps reliably.
View Mason Jar Pump KitConnects the pump to the lid. Replace if loose, bent, or unable to hold a secure fit.
View Pump Stem ReplacementCarries liquid to the tip. Replace if split, stiff, cloudy, stretched, or loose on the fittings.
View Replacement HoseThe outlet tip. Replace if torn, rough, deformed, or unable to attach securely.
View Soft Rectal TipUpdated August 10, 2026
By Eileen Durfee, inventor with 10 U.S. and 6 international patents and designer of the Enema Fix® system. Founder of Nuco Enterprise Solutions LLC.
This manual is for general education and safe operation of the Enema Fix® equipment. It does not diagnose a condition, prescribe a treatment, or establish whether a particular wellness practice is appropriate for you. Enema Fix® products are not intended to diagnose, treat, cure, or prevent any disease or medical condition. Stop use and consult a qualified healthcare professional if you experience pain, bleeding, dizziness, faintness, or any symptom that feels unsafe.
More from Eileen Durfee